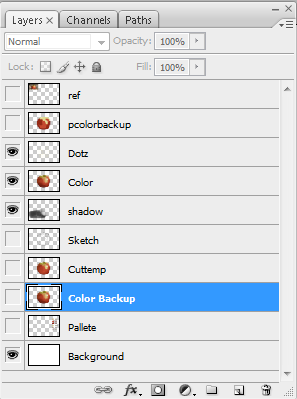
I completed the apple. I hid all the layers not relevant to the picture for display. In light of this I used the snipping tool to make a image of the layers that are hidden.
Zach H. Computer Graphics 3R
Wednesday, January 11, 2012
Tuesday, January 10, 2012
Apple update 2
I added a few streaks today. I also made a basic shadow and the yellow dots that cover the surface of the apple. here's the pic:
Friday, January 6, 2012
Apple Update 1
I worked on the apple project today. It looks nice so far but I think the stem could use more work. I also need to figure out how to add all the lines in the apple.
Friday, December 16, 2011
Abstract Assignment: 2-5 (SORRY, FORGOT TO PUBLISH THIS!)
2. I painted the background black. Then I added a gradient, distorted it with wave, then polarized it so it had radial symmetry. Then I twirled it so it spiraled inward. Then I changed the hue and saturation so it was blue. Then I duplicated and inverted the duplicate and adjusted it so it sat on top of the old layer. Then I merged the layers.
3. I put an image in the background and put a massive Gaussian blur on it. Then I used the elliptical select tool to select roughly half of the image. in a new layer I made a white line along the edge of the selection. Then I rotated it and put it into place on the side of the image. Then I repeated the process with different sized lines. Finally I mad the lines different colors and darkened the background.
4. I added a gradient to the background, then I added a black layer over it. In that layer I did RBG lights and set it to overlay. Then I put clouds over the t layer and set that to overlay and gradient overlay. Then I made another black layer and added noise. Then I made an 'A' out of lines and put a lens flare in the nebula.
5. I added two lens flares and purple clouds. Then I twirled it so it swirled into a vortex. I then added duplicate layers with max saturation and different blend modes.
Sphere of eternal roundness (SPHERE FINAL)
I finished the sphere today. It took three attempts (and a lot of masking) to get the primary cast shadow. hopefully It came out well.
Oh yes, I labeled the layers as well.
Oh yes, I labeled the layers as well.
Monday, December 12, 2011
White ball
I started work on a ball today. The ball itself was the easy part. The hard part is the *shudder* cast shadow. This is what it looks like so far:
Friday, December 2, 2011
Abstract assignment: 01
I used lens flare in the center, then I foreshortened and duplicated it. Then I distorted it with wave. Then I used twirl and duplicated the twirl. Then I turned the hue blue and saturated it. This is the final product:
Subscribe to:
Posts (Atom)


